環境と準備
環境について
今回の実際に構築した環境です。OS:Cent OS 6.5
レンタルサーバーVPSプラン2GB
※1GBプランも試しましたが、全く問題ありません。
openvpnのインストール
上記環境での新規インストール設定例です。ご自身のサーバーで必要な設定のみを行ってください。
-- openssl関連がインストール済か確認(OpenSSL;LZO圧縮(リアルタイムでデータを圧縮・展開:pam)

# rpm -q openssl lzo pam
openssl-1.0.1e-42.el6_7.1.x86_64
lzo-2.03-3.1.el6_5.1.x86_64
pam-1.1.1-20.el6_7.1.x86_64

-- 上記のように、インストールされている場合はOK
-- インストールされていなければそれぞれインストールする
# yum -y install openssl
# yum -y install lzo
# yum -y install pam

-- 以下でエラーが出ないことを確認する
# modprobe tun
#
-- openvpnがインストール済か確認 # rpm -q openvpn package openvpn is not installed -- 上記のように、インストールされていない場合はインストールする # yum -y install openvpn Loaded plugins: fastestmirror, security Setting up Install Process Loading mirror speeds from cached hostfile * base: ftp.jaist.ac.jp * epel: ftp.jaist.ac.jp 〜 中略 〜 Installed: openvpn.x86_64 0:2.3.10-1.el6 Dependency Installed: pkcs11-helper.x86_64 0:1.11-3.el6 Complete! # -- easy-rsaの準備をする -- 必要なものは一部だけなので、ホームディレクトリで作業します。 # cd ~ # wget https://github.com/OpenVPN/easy-rsa/archive/master.zip --2016-02-21 22:18:09-- https://github.com/OpenVPN/easy-rsa/archive/master.zip Resolving github.com... 192.30.252.129 〜 中略 〜 Saving to: `master.zip' 100%[========================================================================>] 55,391 143K/s in 0.4s 2016-02-21 22:18:11 (143 KB/s) - `master.zip' saved [55391/55391] # # unzip master.zip Archive: master.zip 3ec4f245dde71fc489affe1d6ab95fa8c6d29060 creating: easy-rsa-master/ inflating: easy-rsa-master/COPYING inflating: easy-rsa-master/ChangeLog 〜 中略 〜 creating: easy-rsa-master/release-keys/ inflating: easy-rsa-master/release-keys/README.md # # cp -r easy-rsa-master/easyrsa3/ /etc/openvpn/
easy-rsaによるサーバー証明書の準備
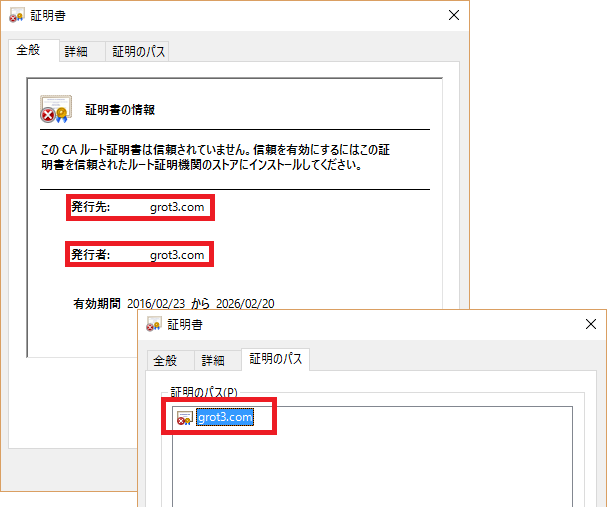
-- 以降はeasy-rsaを使用します。 # cd /etc/openvpn/easyrsa3 -- 初期化 # ./easyrsa init-pki init-pki complete; you may now create a CA or requests. Your newly created PKI dir is: /etc/openvpn/easyrsa3/pki # -- caの作成 # ./easyrsa build-ca Generating a 2048 bit RSA private key ........................+++ ..........+++ writing new private key to '/etc/openvpn/easyrsa3/pki/private/ca.key.ZIkb7yDzYo' Enter PEM pass phrase: ←パスフレーズの入力 Verifying - Enter PEM pass phrase: ←パスフレーズの再入力 ----- You are about to be asked to enter information that will be incorporated into your certificate request. What you are about to enter is what is called a Distinguished Name or a DN. There are quite a few fields but you can leave some blank For some fields there will be a default value, If you enter '.', the field will be left blank. ----- Common Name (eg: your user, host, or server name) [Easy-RSA CA]:grot3.com ←共通名を入力する:画像 CA creation complete and you may now import and sign cert requests. Your new CA certificate file for publishing is at: /etc/openvpn/easyrsa3/pki/ca.crt # -- 作成したcaのコピー # cp ./pki/ca.crt /etc/openvpn/ -- サーバー証明書の作成 # ./easyrsa build-server-full server nopass Generating a 2048 bit RSA private key ..........................+++ ................................+++ writing new private key to '/etc/openvpn/easyrsa3/pki/private/server.key.9q0xG1fxWU' ----- Using configuration from /etc/openvpn/easyrsa3/openssl-1.0.cnf Enter pass phrase for /etc/openvpn/easyrsa3/pki/private/ca.key: ←パスフレーズの入力 Check that the request matches the signature Signature ok The Subject's Distinguished Name is as follows commonName :PRINTABLE:'server' Certificate is to be certified until Feb 19 10:07:29 2026 GMT (3650 days) Write out database with 1 new entries Data Base Updated # -- 作成したサーバー証明書のコピー # cp pki/issued/server.crt /etc/openvpn/ # cp pki/private/server.key /etc/openvpn/ -- dhの作成 # ./easyrsa gen-dh Generating DH parameters, 2048 bit long safe prime, generator 2 This is going to take a long time ........................+..........+................................ ................................................+................... 〜 中略 〜 DH parameters of size 2048 created at /etc/openvpn/easyrsa3/pki/dh.pem # -- 作成したdhのコピー # cp ./pki/dh.pem /etc/openvpn/ #
easy-rsaによるクライアント証明書の準備
# ./easyrsa build-client-full dummy nopass
Generating a 2048 bit RSA private key
...................+++
.................+++
writing new private key to '/etc/openvpn/easyrsa3/pki/private/dummy.key.EPwJcDO2nC'
-----
Using configuration from /etc/openvpn/easyrsa3/openssl-1.0.cnf
Enter pass phrase for /etc/openvpn/easyrsa3/pki/private/ca.key:	←caのパスフレーズ
Check that the request matches the signature
Signature ok
The Subject's Distinguished Name is as follows
commonName            :PRINTABLE:'dummy'
Certificate is to be certified until Feb 19 10:22:34 2026 GMT (3650 days)

Write out database with 1 new entries
Data Base Updated
#

# ./easyrsa revoke dummy
Please confirm you wish to revoke the certificate with the following subject:

subject=
    commonName                = dummy


Type the word 'yes' to continue, or any other input to abort.
  Continue with revocation: yes				←"yes"を入力
Using configuration from /etc/openvpn/easyrsa3/openssl-1.0.cnf
Enter pass phrase for /etc/openvpn/easyrsa3/pki/private/ca.key:	←caのパスフレーズ
Revoking Certificate 02.
Data Base Updated

IMPORTANT!!!

Revocation was successful. You must run gen-crl and upload a CRL to your
infrastructure in order to prevent the revoked cert from being accepted.

#


# ./easyrsa gen-crl

Using configuration from /etc/openvpn/easyrsa3/openssl-1.0.cnf
Enter pass phrase for /etc/openvpn/easyrsa3/pki/private/ca.key:	←caのパスフレーズ

An updated CRL has been created.
CRL file: /etc/openvpn/easyrsa3/pki/crl.pem

#

# cp ./pki/crl.pem /etc/openvpn/
# chmod 604 /etc/openvpn/crl.pem

-- TLS認証鍵(ta.key)を作成する
# openvpn --genkey --secret /etc/openvpn/ta.key
設定ファイル(server.conf)の編集
-- サンプルファイルをコピーする
# cp /usr/share/doc/openvpn-2.3.10/sample/sample-config-files/server.conf /etc/openvpn/

-- 設定ファイルを編集する
# vi server.conf
dev tun		←確認
dh dh.pem	←確認
tls-auth ta.key 0 # This file is secret	←コメント解除
user nobody	←コメント解除
group nobody	←コメント解除
log-append  openvpn.log	←コメント解除
management localhost 7505	←追記
crl-verify crl.pem		←追記
iptables の設定
# iptables -A INPUT -p udp --dport 1194 -j ACCEPT
# service iptables save
iptables: Saving firewall rules to /etc/sysconfig/iptables:[  OK  ]

# service iptables restart
iptables: Setting chains to policy ACCEPT: filter          [  OK  ]
iptables: Flushing firewall rules:                         [  OK  ]
iptables: Unloading modules:                               [  OK  ]
iptables: Applying firewall rules:                         [  OK  ]
#
メモ:
たとえば、sambaをvpn経由で接続し、セキュアsambaみたいにしたい場合、
以下で接続元IPを制御するとセキュリティが上がります。
以下にすることで、VPN接続時に割り当てられたIP「10.8.0.0/24」のみ許可しますので、
iptables -A INPUT -s 10.8.0.0/24 -p udp --dport 137 -j ACCEPT
iptables -A INPUT -s 10.8.0.0/24 -p udp --dport 137 -j ACCEPT
iptables -A INPUT -s 10.8.0.0/24 -p udp --dport 138 -j ACCEPT
iptables -A INPUT -s 10.8.0.0/24 -p tcp --dport 139 -j ACCEPT
